Your RSVP form should match your wedding’s tone, voice, and guest experience — whether formal, fun, or heartfelt. In Thebigdays, you have full control over what questions guests see, how fields appear, and the messages displayed throughout the form.
What Can You Customize?
There are three parts of the RSVP form that you can personalize:
1. Questions
These are the prompts your guests will answer. Each question is connected to a specific field in the guest profile.
| Questions | Information linked to Guest Profile |
| Please enter your name to RSVP. | Guest Name |
| Will you be attending our wedding? | Attending Status |
| How many people are in your group? | Number of Guest |
| Enter your guests name. | Group Member |
| Do you need any dietary request? | Dietary Request |
| Do you need any special request? | Special Request |
| Enter your email to receive confirmation after registration. | Guest Contact Information |
Tip: Edit the wording to reflect your wedding’s tone — formal, casual, playful, or traditional.
2. Fields
These refer to buttons, labels, and system text within the RSVP form. You can modify these to align with your theme or simplify the user experience.
| Field | Description |
| Button | Label for the “Start RSVP” button |
| Attending | Label for selecting “Yes, I’m attending” |
| Not Attending | Label for selecting “No, I’m not attending” |
| Mobile No. | Field label for collecting guest mobile numbers (optional) |
| Field label for email confirmation | |
| Required Field | Message shown when a required field is left blank |
| Invalid Field | Message shown when input doesn’t match the required format |
Customize these to sound more warm, traditional, multilingual, or fun — depending on your audience.
3. Messages
These are system prompts shown during and after form submission. You can customize them to reflect your personality and add a personal touch.
| Message | Description |
| Review Submission | Just before guest submits RSVP |
| Edit Submission | When guest revisits their RSVP to make changes |
| Registration Success | When RSVP submission is successful |
| Registration Failed | When RSVP submission fails due to error |
| Cut off Message | When RSVP is closed after the deadline |
Use friendly or humorous messages like “You’re officially on the list!” or “Oops! Try again, lovebirds.”
Pro Tips
- Customize question text to sound more culturally appropriate or playful.
- Use simple button labels that suit your audience (e.g., “Count Me In” vs. “Yes, I’ll Attend”).
- Tailor error messages to help guests troubleshoot.
- Preview changes live before publishing to ensure readability and tone alignment.
On Thebigdays App
- Open the App
- Go to the Home page and tap Wedding Website.
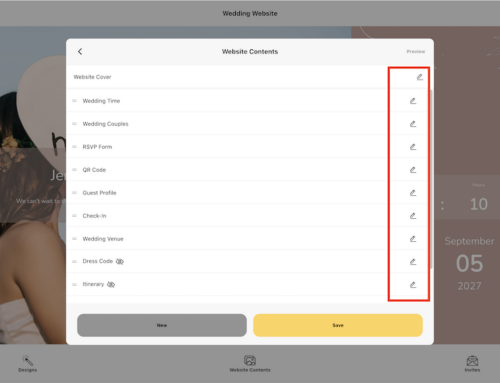
- Tap “Website Contents”
- You’ll see a list of website sections.
- Find the RSVP Form Section
- Tap the Edit button beside the “RSVP Form” section.
- Tap “Edit Form”
- Edit RSVP Questions
- Scroll to view default questions like “Will you be attending?”, “How many guests?”, “Dietary Requests”, etc.
- Tap each question to edit its text or tone
- You can rephrase the questions to suit your wedding theme
- Customize Form Fields
- Modify button labels, placeholder text, and error messages (e.g., “Mobile No.”, “Required Field” reminders).
- Update System Messages
- Edit confirmation messages like:
- Registration Success
- Registration Failed
- Review Submission
- Cut-Off Notice
- Preview & Save
- Tap Preview to see changes instantly.
- Tap Save to apply updates.
On Web Dashboard
- Log in
- Visit https://wedding.thebigdays.com and sign in to your wedding account.
- Go to Wedding Website
- Click Wedding Website in the sidebar.
- Click “Website Contents” > RSVP Form
- Locate the RSVP Form section and click the Edit icon.
- Click “Edit Form”
- Edit Questions
- Click on each question field
- Modify the text as needed
- Questions are mapped to guest data like “Name”, “Number of Guests”, etc.
- Customize Field Labels & Buttons
- Update button texts like “RSVP Now”
- Adjust validation messages for required or invalid inputs
- Edit Confirmation Messages
- Update message prompts shown after form submission:
- “Success”, “Fail”, “Review Info”, “Edit Info”, etc.
- Save Changes
- Click Save Changes to apply your customization.